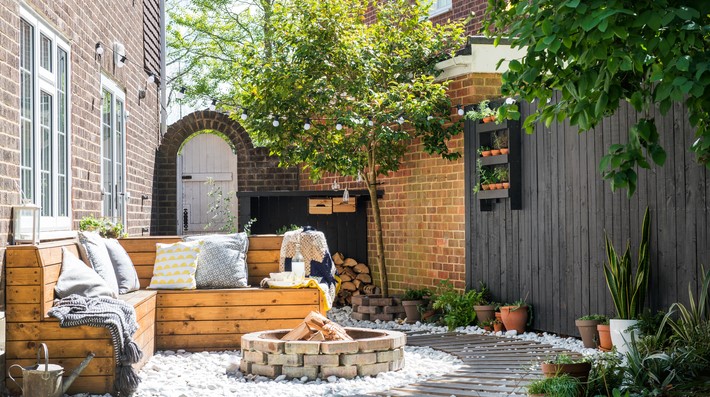
DIY Fence Painting: Enhance Your Outdoor Space with a Fresh Look
A well-maintained fence can be a significant feature of your home’s exterior, offering both privacy and aesthetic appeal. Whether it’s surrounding your garden, providing a boundary to your yard, or simply enhancing the curb appeal of your home, a fresh coat of paint can breathe new life into an old, weathered fence. DIY fence painting is an excellent way to transform your outdoor space without the cost of hiring professionals. With a little time, effort, and the right tools, you can achieve a high-quality finish that adds to the beauty and durability of your fence.
In this article, we’ll walk you through the benefits of DIY fence painting, the materials and tools you’ll need, and step-by-step instructions to ensure a smooth, long-lasting finish. Whether you’re painting a wooden, metal, or vinyl fence, this guide will help you enhance your outdoor space with ease and efficiency.
Why Choose DIY Fence Painting?
Fence painting isn’t just about improving the look of your yard—it’s also an essential part of maintaining the longevity of the structure. Regularly painting or staining your fence can protect it from the elements, preventing damage from weather, insects, and the passage of time. Below are some reasons why DIY fence painting is an excellent idea:
1. Cost-Effective
One of the primary reasons homeowners opt for DIY fence painting is the potential to save money. Hiring a professional to paint your fence can cost several hundred to thousands of dollars, depending on the size and complexity of the job. Doing it yourself allows you to control the expenses and significantly reduce the labor costs. The primary investment will be in materials like paint, brushes, or sprayers, which are relatively inexpensive and can be reused for future projects.
2. Personalized Touch
By taking on the task of painting your fence yourself, you have full control over the colors and finishes you choose. Whether you want a classic neutral shade, a bold accent color, or even a custom design, DIY fence painting lets you personalize your fence to suit your style. You can also choose the type of paint or stain that best complements the overall aesthetic of your home and garden, ensuring that your fence matches perfectly with your outdoor decor.
3. Satisfaction of Accomplishment
There’s a unique sense of satisfaction that comes with completing a DIY project, and painting your fence is no exception. By doing the work yourself, you’ll enjoy the pride of seeing your hard work translate into a beautifully enhanced outdoor space. Plus, DIY projects offer an opportunity to learn new skills and gain a deeper understanding of home maintenance and improvement.
Preparing for Your DIY Fence Painting Project
Before diving into the painting process, it’s important to properly prepare your fence and gather the necessary materials. Proper preparation will ensure that the paint adheres well and provides a durable, smooth finish. Here’s what you’ll need and how to get ready for your DIY fence painting project:
1. Materials and Tools Required
- Paint: Choose an outdoor fence paint that suits your type of material (wood, metal, vinyl). Make sure it’s weather-resistant and durable to withstand outdoor conditions.
- Primer: If you’re painting untreated wood or a previously unfinished fence, apply a primer to help the paint adhere better and ensure a longer-lasting finish.
- Brushes and Rollers: Use a brush for corners, edges, and intricate areas. A roller is helpful for larger flat surfaces and can speed up the process.
- Sprayer: If you’re looking for a faster and more uniform application, consider using a paint sprayer. This tool is especially useful for larger fences.
- Drop Cloths or Tarps: Protect your lawn, garden, and any other surrounding areas from paint splatters.
- Painter’s Tape: Use this to mask off any areas you don’t want to paint, such as the ground or nearby structures.
- Sandpaper: For wooden fences, sanding the surface before painting is essential to remove any rough spots and ensure a smooth finish.
- Cleaner/Pressure Washer: To clean your fence before painting, use a cleaner designed for outdoor surfaces, or pressure wash it to remove dirt, grime, and loose paint.
2. Preparing the Fence
Before you begin painting, it’s crucial to properly prepare the surface of your fence. Here’s a step-by-step guide to getting it ready for a fresh coat of paint:
- Clean the Fence: Begin by cleaning the surface thoroughly to remove dirt, mold, mildew, or any other debris. For wooden fences, use a wood cleaner or mild detergent and water. For metal or vinyl fences, a pressure washer can be used to effectively remove built-up grime. Allow the fence to dry completely before painting.
- Inspect and Repair: Check for any damage to your fence. If there are loose or rotting boards, replace them before painting. For wooden fences, fill any cracks or holes with wood filler and sand them smooth. This will ensure a clean, smooth surface for the paint to adhere to.
- Sand the Surface: Lightly sand the surface of the fence to remove any rough areas, peeling paint, or old finishes. Sanding also helps the paint adhere better to the surface. For wooden fences, make sure to follow the grain of the wood to avoid scratches.
- Apply Primer: If needed, apply a primer to untreated wood or metal fences. This will create a smooth base and enhance the coverage of your paint, helping it last longer.
Step-by-Step Guide to DIY Fence Painting
Now that your fence is prepped and you have all your materials ready, it’s time to start painting. Follow these steps for a successful DIY fence painting project:
1. Start with the Edges and Corners
Begin by painting the edges and corners of the fence, which are harder to reach with a roller or sprayer. Use a brush to carefully apply paint to these areas, ensuring that you don’t miss any spots. This process helps create a clean and polished look once the entire fence is painted.
2. Use a Roller or Sprayer for the Flat Surfaces
Next, use a roller or paint sprayer for the large, flat sections of the fence. Rollers are effective for smooth, even coverage, while sprayers can provide a more uniform coat, especially for large fences. Be sure to apply the paint in long, even strokes to avoid drips and streaks.
3. Apply a Second Coat
For a durable and even finish, most fences will require two coats of paint. After the first coat dries (usually within 2-4 hours, depending on weather conditions), inspect the fence to ensure full coverage. If necessary, apply a second coat for a rich, long-lasting finish. Be sure to allow the paint to dry completely between coats.
4. Clean Up
Once your fence is fully painted and dry, remove any painter’s tape and drop cloths. Clean your brushes, rollers, or sprayers according to the manufacturer’s instructions to extend their lifespan. Dispose of any paint cans or leftover paint responsibly, following local guidelines.
In conclusion, DIY fence painting is a rewarding and cost-effective way to enhance your outdoor space. By following the proper preparation and painting techniques, you can achieve a fresh, vibrant look for your fence that will last for years to come. Not only will this project improve the curb appeal of your home, but it will also help protect your fence from the elements, ensuring its longevity. With a little effort and creativity, you can transform your outdoor area and enjoy a beautifully painted fence that complements your home’s style.