Mosaic Marvel: Crafting a Stunning DIY Mosaic Table
Mosaic Marvel: Crafting a Stunning DIY Mosaic Table is a comprehensive guide that provides step-by-step instructions on how to create a beautiful, unique mosaic table. This DIY project combines creativity and craftsmanship, allowing individuals to transform a simple table into a stunning piece of art. The guide covers everything from selecting the right materials, designing the mosaic pattern, to the actual process of laying the tiles. It is an excellent resource for both beginners and experienced crafters looking to explore the art of mosaic making.
Mastering the Art of DIY Mosaic Table: A Step-by-Step Guide to Creating Your Mosaic Marvel
Mosaic Marvel: Crafting a Stunning DIY Mosaic Table
The art of mosaic has been a form of creative expression for centuries, with its roots tracing back to ancient civilizations. Today, this timeless craft continues to captivate with its intricate designs and vibrant colors. One of the most popular applications of mosaic art in modern times is in the creation of stunning mosaic tables. These unique pieces of furniture not only serve a functional purpose but also add a touch of elegance and individuality to any space.
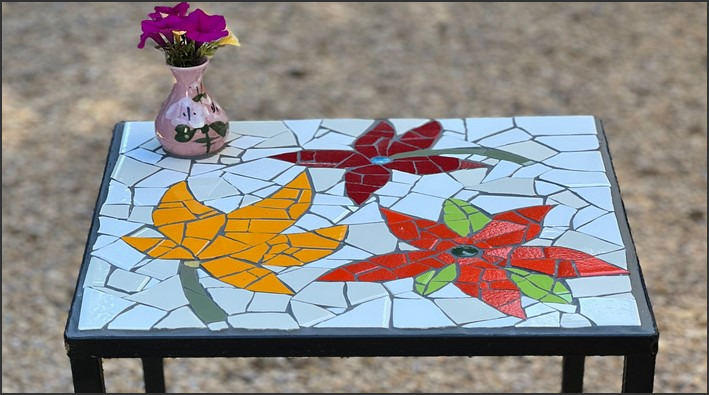
Creating a DIY mosaic table may seem like a daunting task, but with the right tools, materials, and a step-by-step guide, you can master this art and craft your own mosaic marvel. The first step in this process is to gather your materials. You will need a table, ceramic tiles or glass pieces, adhesive, grout, a sponge, and a grout sealer. It’s important to choose a table that is sturdy and can withstand the weight of the mosaic. The tiles or glass pieces will form the mosaic design, so choose colors and shapes that align with your vision for the table.
Once you have your materials, the next step is to create your design. This can be as simple or as complex as you like. You can sketch your design directly onto the table or create a paper template. When you’re happy with your design, it’s time to start applying the tiles. Using the adhesive, stick the tiles onto the table following your design. It’s best to start from the center and work your way outwards. This process requires patience and precision, but the end result will be worth it.
After all the tiles are in place, let the adhesive dry completely. This usually takes about 24 hours. Once the adhesive is dry, it’s time to apply the grout. The grout fills in the gaps between the tiles and helps to secure them in place. Using a sponge, spread the grout over the entire surface of the table, making sure to fill in all the gaps. Once the grout has been applied, let it dry for another 24 hours.
The final step in creating your DIY mosaic table is to seal the grout. This is an important step as it protects the grout from moisture and stains, ensuring that your table will last for years to come. Apply the grout sealer according to the manufacturer’s instructions and let it dry completely.
Creating a DIY mosaic table is a rewarding project that allows you to express your creativity and add a unique piece of furniture to your home. It requires time, patience, and attention to detail, but the end result is a stunning mosaic marvel that you can be proud of. Whether you’re an experienced DIY enthusiast or a beginner, this project is a great way to explore the art of mosaic and create something truly special. So gather your materials, roll up your sleeves, and start crafting your mosaic masterpiece.